
Looking for a quick, easy, cheap DIY project? I have a PERFECT project for you.
A few weeks ago, while going through the closet in our spare room, I found 3 painted canvases given to me by a coworker. I wasn't a huge fan of them initially but I'd hoped I'd find a place for them at some point... Yeah. Guess that place was the closet. So, after rediscovering them this weekend, I decided it was time to finally use them.... With some modifications.
I knew JUST the spot for them too!
I recently moved our kitchen around & in doing so, created a little "coffee area" with the keurig & some hanging mugs. It's cute, but it's on top of a mini-pantry & there was a good amount of blank wall above it.

Anyway, here's what the 3 pictures looked like before:

Not really my style. So, after a trip to Michael's & about 10 bucks later, I had all the supplies to change these babies into something I'd want to hang up. Here's what you'll need to pull off something similar:
First thing: canvas artwork. It can be anything. I suggest something with a lot of color that will contrast with whatever color spray paint you use. The dollar store has some cheap & relatively cool options. I've had luck with canvas art at Big Lots recently & you can even check your local Walmart too because I guarantee they've got a selection of canvas art at a decent price.
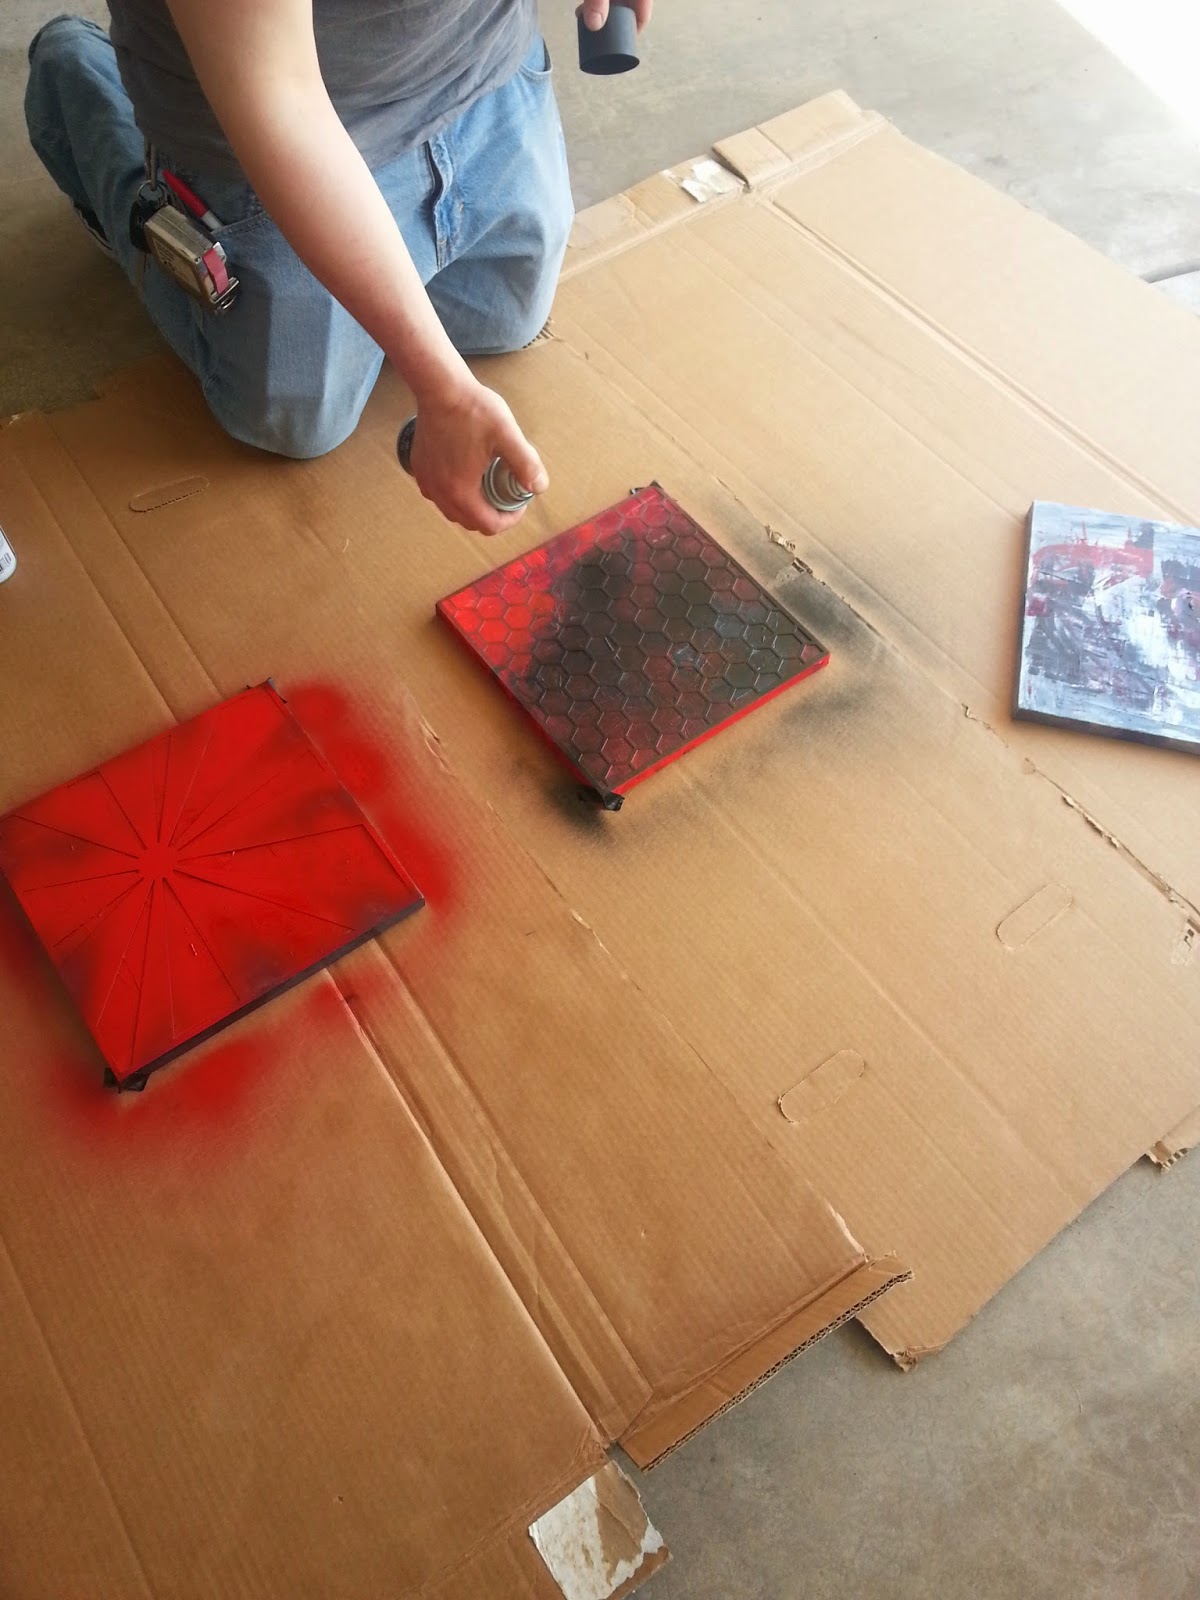
Once you've got your artwork, stop into your local Michael's (in the scrapbook/stamp aisle) & get a few of these. I absolutely LOVED the honeycomb design on this Make Me Pretty Stuff template. It's a bendable plastic material & it's super easy to work with. These were the largest templates they had at my local Michael's & they were 4.99 a piece. They had a bunch of other designs & I literally loved every single one of them. The winning designs were picked using eeny miney moe so you know they're good. :-) Don't want to spring for templates like these? Make your own! Poster board or card stock & an exacto knife can absolutely create the same effect with a much, much smaller price tag. Bonus points for creativity too!

The next thing you'll need is some spray paint. I always have spray paint laying around because on a regular basis I ask my husband to paint things red or black for me. Don't even ask. Just know that my house has a LOT of red & black...
I'm a pretty big fan of rustoleum spray paint. It's so easy to use, the color lasts & in my experience, the colors are vibrant & pretty.
Anyway, I suggest taping the corners of your template to the painting. Do it in a way that doesn't interfere with the painting itself. We taped off the sides of the canvas. Then you just spray paint evenly over the canvas/template. I had to do 2 coats so depending on how thick you spray, you may have to repeat this a few times.
The finished product was pretty snazzy. I really love the fact that our artwork is custom & it matches my kitchen really, really well! Plus, honeycomb! SO OBSESSED.


Check back in a few days for a post about another fun DIY project we've finished recently! <3 p="">

No comments:
Post a Comment